
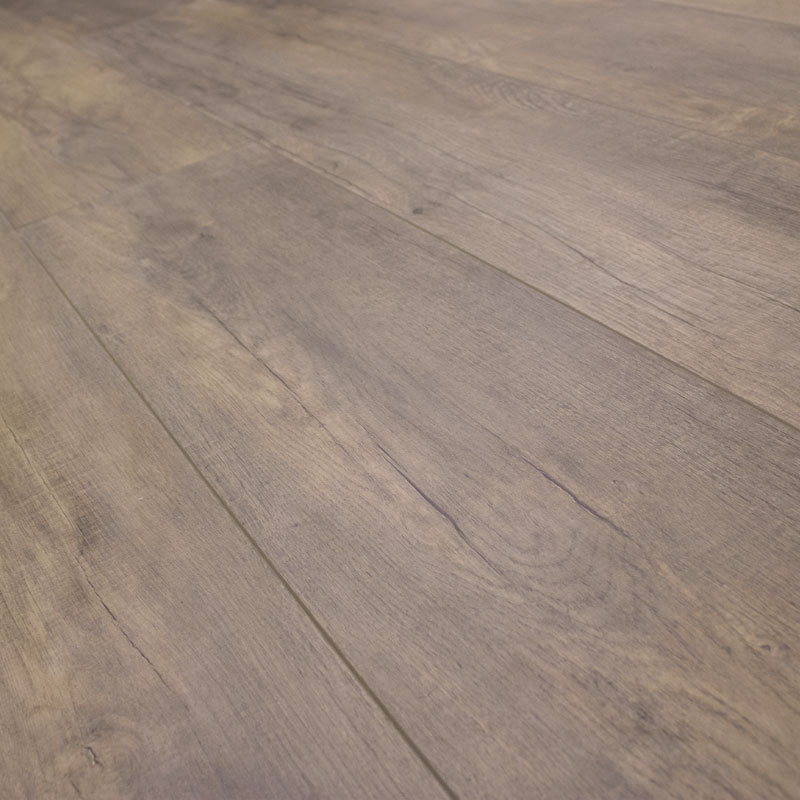
Vinyl plank is one of the most scratch-resistant floors you can buy, but it is not scratch-proof. A dragged chair, a dropped cast-iron pan, or a dog's nails digging in on a wet floor will still mark the surface. The good news is that most damage is fixable without replacing the whole room. Light scratches buff out with a color-matched repair kit in about 15 minutes. Deeper gouges and dents usually mean swapping one plank, not the entire floor.
We install and repair luxury vinyl plank flooring across San Diego County, including homes in Encinitas and Coronado where beach sand and salt air work their way into the house and accelerate surface wear on any hard floor, vinyl included. This guide covers exactly how to fix scratches and dents yourself, when a plank swap is the right call, and when the damage means the floor has to go.
Have damage you are not sure how to fix? Request a free in-home estimate or call +1 (619) 777-4334.
Fixing Minor Scratches with a Vinyl Repair Kit
Surface scratches that only affect the clear protective coating, not the printed design layer underneath, are the easiest fix on any floor. A vinyl or laminate repair kit runs $15 to $30 and includes a set of color-matched wax or putty sticks, a plastic scraper or burn-in knife, and a fine buffing pad. The process takes about 10 to 15 minutes per scratch:
- Clean the area. Wipe the scratch with a damp microfiber cloth and let it dry fully. Any grit left in the scratch will get sealed in under the filler.
- Match the color. Most kits include 3 to 6 wax stick shades. Blend two shades together on a scrap surface if your plank falls between the stock colors, which is common with wood-look LVP.
- Fill the scratch. Warm the wax stick slightly (some kits include a small heat tool) and press it into the scratch, slightly overfilling so it sits a hair proud of the surface.
- Level and buff. Scrape off the excess with the plastic edge tool at a low angle, then buff with the included pad until the filled area is flush and the sheen matches the surrounding plank.
This works well for hairline scratches, light scuffs, and thin scrapes from moved furniture or a dragged box. It will not disappear entirely under close inspection or raking light from a window, but from normal viewing height it blends in well enough that most people never notice a repaired scratch again. The same wax-fill method works on laminate flooring, since both products use a similar clear wear layer over a printed image layer.
How Do You Fix a Dent in Vinyl Plank Flooring?
Dents and gouges are a different repair than a surface scratch because material has been compressed or removed, not just marked. The fix depends on how deep the damage goes.
Shallow Dents (Wear Layer Intact)
A shallow dent from a dropped can or a furniture leg that has not broken through the clear wear layer can sometimes be softened out with gentle heat. Lay a slightly damp cloth over the dent and run a hair dryer or heat gun on low, moving it constantly, for 60 to 90 seconds. Rigid-core LVP (SPC and some WPC cores) has enough flexibility in the wear layer that mild heat lets the surface relax back toward flat. Press down with a flat, padded weight (a book wrapped in a towel works) while it cools. This is not a guaranteed fix and it does not work on every dent, but it costs nothing to try before moving to a plank swap.
Deep Gouges (Wear Layer Broken)
Once a gouge has broken through the wear layer and chewed into the printed design layer or the vinyl core underneath, heat will not fix it. At this point you are choosing between a cosmetic fill (same wax or two-part epoxy filler method as a scratch, sanded level once cured) or replacing the individual plank. A filled gouge holds up fine underfoot but will usually show as a slightly duller or thicker spot compared to the surrounding floor, especially on glossy finishes. On a low-traffic wall edge that is often an acceptable trade-off. In the middle of a kitchen or entry, a plank replacement gives a cleaner result.
Replacing a Damaged Plank, Click-Lock vs Glue-Down
Vinyl plank is installed one of two ways, and the repair method is completely different for each. Knowing which one you have (check the underside of a spare plank, or how the floor feels when you press near a seam) determines the job.
Click-Lock (Floating) Vinyl Plank
Click-lock planks snap together edge to edge without adhesive, which makes single-plank replacement more involved but still doable without pulling up the whole room:
- Score the damaged plank down its center length with a utility knife and pry out the two halves, working from the cut toward the edges.
- Cut or grind off the locking tongue on the replacement plank's edges (a rotary tool with a thin cutoff wheel works well) so it can drop straight down into the gap instead of needing to be angled in.
- Set the modified plank into the opening and run a bead of urethane or PL premium construction adhesive along the underside edges where it meets the neighboring planks.
- Weight the plank flat for 12 to 24 hours while the adhesive cures.
This method leaves the replacement plank glued in place while everything around it still floats, which is fine structurally since it is one plank among hundreds. It is a job most handy homeowners can do with patience, though it is easy to crack a neighboring plank's locking edge if you rush the removal step, which is when we usually get called in.
Glue-Down Vinyl Plank
Glue-down LVP is fully adhered to the subfloor, which makes removal more physical but the replacement itself more straightforward:
- Score along all four seams with a utility knife to separate the damaged plank from its neighbors.
- Use a floor scraper or heat gun to soften the old adhesive and lift the plank off the subfloor in pieces.
- Scrape the subfloor clean of old adhesive residue down to a flat, smooth surface, since any leftover ridges will telegraph through the new plank.
- Spread new vinyl adhesive or apply pressure-sensitive seam tape, set the replacement plank, and roll it with a 75 to 100 pound floor roller (or stand and walk the full plank repeatedly) to seat it flat and push out trapped air.
Glue-down replacement takes longer per plank because of the adhesive removal step, but there is no locking mechanism to damage on the surrounding planks, which makes it more forgiving for a first-time DIY repair.
When the Wear Layer Is Too Damaged to Repair
Every vinyl plank has a clear wear layer on top of the printed design layer, and that wear layer thickness is the single biggest factor in how much damage a floor can take before repair stops being realistic. Residential LVP typically runs 6 to 12 mil, mid-grade products run 12 to 20 mil, and light commercial or heavy-use residential products run 20 to 28 mil.
| Wear Layer | Typical Grade | Repair Outlook |
|---|---|---|
| 6 to 8 mil | Budget residential | Scratches easily; deep gouges often need plank replacement rather than fill |
| 12 mil | Standard residential | Wax-fill works well for most surface scratches; gouges usually repairable with epoxy filler |
| 20 mil | Premium residential / light commercial | Resists most scratches from normal use; damage that does occur is usually from a sharp impact |
| 28 mil | Commercial grade | Rarely scratches under residential traffic; repair is almost always a full plank swap when it does occur |
You can tell the wear layer is compromised beyond a cosmetic fix when you see any of the following: a whitish or frosted look inside the damaged area (light scattering off exposed core material instead of the clear coat), the printed pattern itself is scraped away leaving a solid gray or tan patch, or the edges of the damage are frayed and lifting rather than a clean scratch line. At that point, a wax or epoxy filler sits on top of raw material with nothing to bond to properly, and it will discolor or pop out within months. Plank replacement is the only repair that actually holds.
If the damage covers several adjacent planks, such as from a long dragged appliance or a pet that has clawed the same 3-foot stretch repeatedly, replacing that whole run of planks in one pass looks better than patching them individually, since seams from a staggered multi-plank repair are less noticeable than several separate patch jobs scattered across the same area.
Preventing Future Scratches and Dents
Prevention costs a lot less than any repair, and most of it comes down to controlling what touches the floor.
- Felt pads under every piece of furniture. Check them every 6 to 12 months. Felt pads compress and pick up grit over time, and a hardened, gritty pad scratches worse than no pad at all.
- Furniture cups or plywood squares under heavy pieces. Pianos, china cabinets, and appliances concentrate their full weight on 4 small feet, which can create a permanent dent even on a good wear layer if left in one spot for years.
- Area rugs and runners at entries. A 5 to 6 foot runner at every exterior door catches the sand, gravel, and grit that causes most fine scratching before it ever reaches the open floor.
- Vinyl-safe rug pads only. Some rubber-backed rug pads contain plasticizers that react with vinyl plank over time and leave a permanent yellow stain or soft spot. Look for a pad labeled safe for vinyl or LVP specifically.
- Trim pets' nails regularly. Long or overgrown nails, especially on dogs that run or slide on smooth floors, are one of the most common causes of fine scratching we see in vinyl plank homes.
- Lift, do not drag, furniture. Use furniture sliders for anything too heavy to lift, even for a few feet across the room.
- Avoid stiletto heels on bare vinyl. A 120-pound person walking in a narrow heel can put over 2,000 psi on that single point of contact, more pressure per square inch than most vehicle tires, which is enough to dent even a good wear layer.
These same habits also apply to hardwood and any resilient floor. The Resilient Floor Covering Institute, an industry group covering care standards for vinyl and other resilient flooring, publishes general maintenance guidance that lines up with what we tell every customer at handoff, available at rfci.com.
Repair Cost vs Replacement Cost
Here is what each level of repair typically costs, whether done yourself or by a professional:
| Repair Type | DIY Cost | Professional Cost |
|---|---|---|
| Wax-fill scratch kit | $15 - $30 (kit, reusable) | $75 - $125 per visit (small jobs, several scratches) |
| Epoxy filler for a gouge | $10 - $20 per tube | $100 - $175 per visit |
| Single plank replacement, click-lock | $5 - $15 (matching plank, if in stock) | $100 - $200 per plank (labor-heavy due to removal) |
| Single plank replacement, glue-down | $5 - $15 (matching plank, if in stock) | $125 - $225 per plank (adhesive removal adds time) |
| Multi-plank section replacement | Varies by size | $8 - $14 per square foot |
| Full room replacement | N/A | See our vinyl plank flooring page for current installed pricing |
The math almost always favors repair over replacement for isolated damage. A single plank swap costing $100 to $225 is a fraction of the cost of replacing an entire room, and it is worth calling a flooring contractor for a quote before assuming a scratched or dented floor needs to come out. Matching plank availability is the main variable. Manufacturers discontinue colors every few years, so a floor installed more than 3 to 4 years ago may need a close color match rather than an exact one, which is another reason to keep a leftover box from the original install.
Frequently Asked Questions
Can You Fix a Deep Scratch in Vinyl Plank Flooring?
Yes, if the scratch has not gone through the wear layer into the printed design layer. A color-matched wax or epoxy filler, leveled and buffed, hides most deep scratches well. If the scratch has exposed the core material underneath (visible as a whitish or frosted patch), a filler will not hold long term and the plank should be replaced instead.
How Do You Get a Dent Out of Vinyl Plank Flooring?
For a shallow dent that has not broken the wear layer, lay a damp cloth over the spot and apply gentle heat from a hair dryer for 60 to 90 seconds, then press it flat with a padded weight while it cools. This works on some rigid-core products but is not guaranteed. A dent that has cracked or broken the wear layer needs the plank replaced rather than heated.
Can a Single Vinyl Plank Be Replaced Without Replacing the Whole Floor?
Yes. Click-lock planks are cut out and the replacement is glued in from underneath after removing its locking tongue. Glue-down planks are scored at the seams, scraped free of old adhesive, and the new plank is glued and rolled into place. Both methods leave the surrounding floor untouched and typically cost $100 to $225 per plank professionally installed.
Is It Hard to Replace a Glue-Down Vinyl Plank?
It is more physical than click-lock replacement because the old plank has to be scraped free of adhesive, but it is arguably more forgiving since there is no locking edge on neighboring planks that can crack during removal. Most of the work is scraping the subfloor flat before the new plank goes down.
What Is a Wear Layer and Why Does It Matter for Repairs?
The wear layer is the clear protective coating on top of the printed design layer in vinyl plank. It typically ranges from 6 mil in budget products to 28 mil in commercial-grade products. As long as damage stays within the wear layer, a filler repair blends in and holds up. Once the wear layer is broken and the printed layer or core underneath is exposed, filler will not bond properly and the plank needs to be replaced.
Will a Scratch Repair Kit Match My Floor Color Exactly?
Usually close, not always exact. Repair kits include several wax shades that can be blended, but vinyl plank colors vary slightly by dye lot and fade slightly over years of UV exposure. A repair done with a kit bought at install time typically matches better than one bought years later. Test the blend on a spare plank or an inconspicuous corner first.
How Do I Stop My Floors from Getting Scratched by Furniture?
Put felt pads under every leg and check them every 6 to 12 months, since worn or gritty pads scratch worse than none at all. Use furniture sliders instead of dragging anything heavy, and place a cup or plywood square under pianos, cabinets, and appliances that stay in one spot for years to spread out the weight.
Does Homeowners Insurance Cover Vinyl Plank Floor Damage?
Typically no, for scratches and dents from normal wear, furniture moves, or pets, since those are considered maintenance issues rather than a covered peril. Insurance is more likely to cover flooring damage from a sudden, specific event like a burst pipe or fire. Check your policy's language on "sudden and accidental" damage before assuming a claim will be paid out for surface wear.