
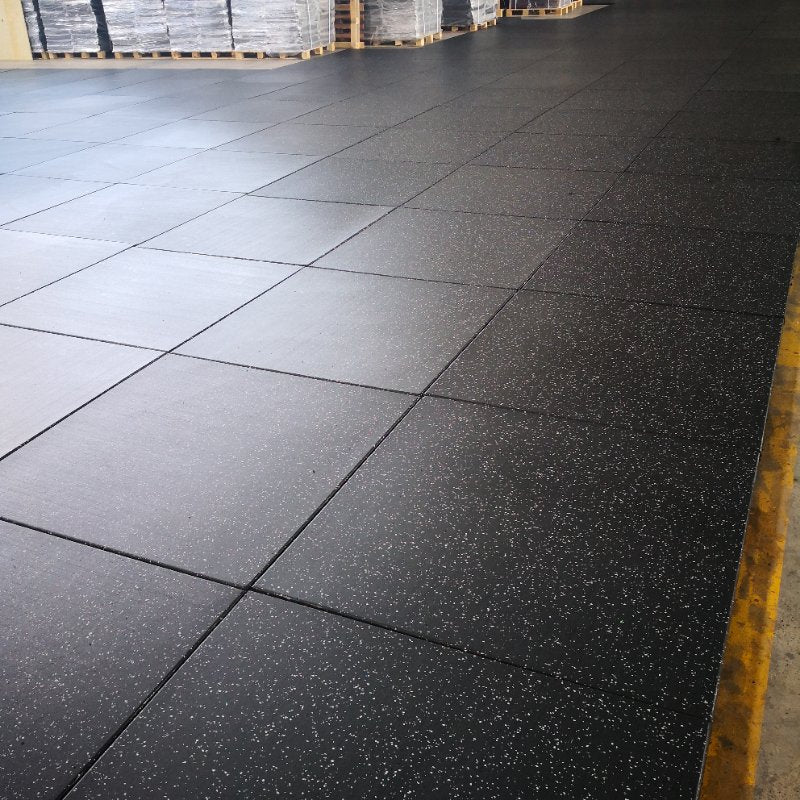
A garage floor takes a different kind of abuse than the rest of the house. The bare slab already has hairline cracks from curing and years of temperature swings, there is probably an oil stain or two near where the car usually sits, and the floor gets asked to handle dropped tools, rolling tool chests, parked vehicles, and the occasional spilled can of paint or brake fluid. Hardwood and laminate are not options on a slab like that. Tile cracks along the same lines the concrete already has. Rubber flooring is one of the few materials built to go over an imperfect garage slab as it is, not after an expensive tear-out and re-pour.
We install rubber flooring for garages across San Diego County, in both interlocking tile and full rolled formats, and we also install VCT as a lower-cost alternative for garages that get used more like a workshop than a car park. This guide covers what rubber actually does for a cracked or stained slab, how to choose between tile and rolled rubber, whether it holds up under a parked car, and how the cost compares to an epoxy coating, which is a different category of product entirely and one we do not install.
Ready to cover your garage floor? Request a free in-home estimate or call +1 (619) 777-4334.
Why Rubber Flooring Works So Well in a Garage
A garage slab is rarely in showroom condition by the time a homeowner starts thinking about covering it. Hairline shrinkage cracks are normal in any concrete slab, oil and transmission fluid drips leave dark spots that never fully scrub out, and years of parking, jack stands, and dropped sockets leave the surface pitted and uneven in places. Rubber flooring goes down over that reality instead of requiring it to be fixed first. Once a rubber tile or rolled surface is down, hairline cracks, old stains, and minor surface pitting disappear from view completely, and they stay hidden because rubber does not telegraph the same way thinner materials do.
Most rubber garage flooring is made from recycled styrene-butadiene rubber (SBR), ground from used tires and bonded with a polyurethane binder, sometimes topped with a thin layer of virgin EPDM rubber for color and a cleaner surface finish. Both versions absorb impact rather than transmitting it straight into the slab, which matters in a garage where a dropped wrench, a car jack slipping off a stand, or a rolling tool chest hitting a wall corner is a matter of when, not if. Rubber is also naturally slip resistant when wet, which is worth something in a room that regularly gets tracked-in rain, hose water, or a leaking radiator hose.
Interlocking Rubber Tile vs Rolled Rubber for a Garage
Both formats come in the same 3/8 inch to 3/4 inch thickness range for garage use. The choice usually comes down to how the garage gets used and who is doing the installing.
Interlocking rubber tile ships in 20 by 20 inch or 24 by 24 inch squares with puzzle-piece edges and needs no adhesive, which makes it the more popular DIY option for a garage. A homeowner can lay a two-car garage in a weekend, individual tiles can be pulled up for car repairs or a workbench move and put right back, and a damaged tile near the workbench or under the jack points can be swapped out without touching the rest of the floor. The trade-off is visible seams every 20 to 24 inches and a slight edge lip where the garage door meets the floor, which needs a threshold ramp piece to avoid a trip hazard.
Rolled rubber ships in large rolls, typically 4 feet wide, and gets installed with full-spread adhesive for a single continuous surface with almost no seams. It looks and performs like a commercial workshop floor, sheds oil and dust more easily because there are fewer seams to trap debris, and handles a rolling tool chest or floor jack smoothly across the whole garage without catching on a tile edge. The trade-off is weight and handling. A roll of 3/8 inch garage rubber weighs several hundred pounds, so we recommend a professional install for anything beyond a single-car bay.
| Feature | Interlocking Tile | Rolled Rubber |
|---|---|---|
| Best for | DIY installs, garages that need occasional access under the floor | Full-garage coverage, workshops, cleanest finish |
| Seams | Every 20 to 24 inches | Minimal, fully bonded |
| Install | DIY friendly, one weekend for a two-car garage | Professional install recommended, heavy material |
| Repair | Pop out and swap a single tile | Cut and patch from matching roll stock |
Rubber Flooring for a Garage Workshop
Garages that double as a workshop put different demands on a floor than a garage that only parks cars. Standing at a workbench for an hour at a stretch is easier on the knees, hips, and lower back on rubber than on bare concrete, which is one of the most common reasons homeowners cover a workshop floor in the first place. Dropped hand tools, hardware, and small parts also bounce or thud on rubber instead of chipping the surface or bouncing further than expected the way they do on tile or a hard epoxy coating.
Rubber holds up fine against grease, motor oil, and most water-based finishes, but it is worth knowing its limits before a workshop project gets underway. Strong solvents such as gasoline, acetone, and lacquer thinner can soften or discolor the rubber binder with repeated, prolonged contact, so a rubber-backed drip mat or a dedicated parts-washing tray under a solvent bench is a smart add rather than letting spills sit directly on the floor. For that reason, a workshop that does heavy solvent-based finishing or engine work sometimes does better with VCT or sealed tile in that one zone, with rubber covering the rest of the garage where comfort and impact resistance matter more.
Is Rubber Flooring Good for a Garage Where You Park a Car?
Yes, for garage-rated rubber at 3/8 inch or thicker. A car's weight is spread across four tire contact patches, which is a far lighter point load than a loaded barbell or a car jack stand, both of which garage-rated rubber is already built to handle without denting or compressing permanently. Full rubber tile and rolled rubber (not the thin foam interlocking mats sold for kids' playrooms) hold up fine under daily parking, in and out traffic, and the weight of a jack stand set under the frame.
One thing worth knowing: hot tire pickup, where a hot tire reacts with the plasticizers in a floor covering and leaves a sticky residue or discoloration, is mostly a vinyl and PVC composite tile problem, not a pure rubber one, since rubber tile does not rely on the same plasticizers. It is still smart to avoid parking directly on the same exact spot for months at a time without moving the car, since any resilient flooring can show slight compression marks under a stationary tire over a long period. For a garage that also serves as a workshop or gym part-time, we generally recommend 1/2 inch thickness rather than the minimum 3/8 inch, since the extra thickness holds up better across mixed use over the years.
Preparing Your Garage Slab, Cracks, Oil Stains, and Moisture
Rubber is far more forgiving of an imperfect slab than tile or epoxy, but a real prep process still matters for a long-lasting install.
- Degrease oil and fluid stains. Old motor oil, transmission fluid, and grease spots get scraped and degreased so adhesive (for rolled rubber) bonds properly and the stain does not bleed through a thin tile over time.
- Measure crack width. Hairline cracks under about 1/16 inch generally do not telegraph through 3/8 inch rubber or thicker and can be floored over directly, which is one of rubber's biggest advantages over tile in a garage.
- Fill wider cracks. Cracks around 1/8 inch or wider, or any crack where one side sits higher than the other, get filled with an epoxy crack filler and ground flush before rubber goes down.
- Grind high spots and old patches. Rubber does not hide a raised area the way carpet padding would, so lippage at a crack, an old concrete patch, or a control joint gets ground level first.
- Confirm the slab is fully cured on new construction. A freshly poured garage slab needs roughly 28 to 90 days to cure before full-spread adhesive rolled rubber goes down; a loose-lay interlocking tile can generally go down sooner since it does not depend on an adhesive bond.
We see this most often in garage conversions in older tract-home neighborhoods like Escondido and Vista, where decades-old slabs have picked up plenty of hairline cracking and stains, but the same prep applies to any garage slab across the county, including newer construction in San Diego proper.
Rubber Flooring Cost vs Epoxy Coating for a Garage
A lot of homeowners comparing garage floor options are really deciding between rubber flooring and an epoxy coating applied directly to the slab. These are two different categories of product, not two versions of the same thing, so it is worth understanding both honestly. We install rubber tile and rolled rubber but do not apply epoxy coatings ourselves, so here is a factual side-by-side rather than a sales pitch for one over the other.
| Option | Installed Cost/sqft | Hides Cracks and Stains | Cure or Install Time |
|---|---|---|---|
| Interlocking rubber tile (3/8") | $3.50 - $5.50 | Yes, directly over hairline cracks | 1 day, ready to use immediately |
| Rolled rubber (3/8" to 1/2") | $4.50 - $7.50 | Yes, directly over hairline cracks | 1 to 2 days including adhesive cure |
| Heavy-duty rolled rubber (3/4") | $6.50 - $9.50 | Yes | 2 days |
| DIY epoxy kit | $1.50 - $3.00 (materials only) | No, cracks must be patched first and often still show | 2 to 3 days before light use, up to a week for full cure |
| Professional 2-coat epoxy with flake | $4.00 - $9.00 | No, cracks must be patched first | 3 to 5 days including cure before vehicle traffic |
For a typical 400 square foot two-car garage, that puts rubber tile around $1,400 to $2,200 fully installed and professional epoxy around $1,600 to $3,600. The real difference is not just price, it is what each product does with an imperfect slab. Epoxy bonds directly to the concrete, so any existing crack, control joint, or uneven patch will usually still show through the coating, and can eventually crack along the same line as the slab underneath it. Epoxy also needs the concrete acid-etched or diamond-ground before application, adds real cure time before the garage is usable again, and most coatings need a recoat or refresh every 5 to 10 years depending on traffic and sun exposure through the garage door. Rubber flooring installs faster, hides existing cracks and stains without patching first, and does not need to be reapplied. Its higher upfront material cost is the trade-off for skipping the slab prep, cure time, and recoat cycle that epoxy requires. Our free in-home estimate includes a slab inspection so you get an exact price for your garage before any work starts.
Cleaning and Maintaining Garage Rubber Flooring
Rubber garage flooring is low-maintenance but benefits from a few habits. Sweep or blow out grit and dirt regularly since sharp debris tracked in on shoes or tires can grind into the surface underfoot over time. For a fresh oil or fluid drip, wipe it up promptly with a shop rag, then clean the spot with a pH-neutral cleaner or a degreaser labeled safe for rubber. Avoid straight citrus-based degreasers and strong solvents for routine cleaning; they can soften the polyurethane binder in the rubber with repeated use, the same way they would on a rubber gym floor.
Direct sun through an open garage door can fade dark rubber to a grayish tone over several years, so closing the door during peak afternoon hours in south-facing garages slows that fade. If a tile edge lifts or a rolled seam starts to separate, re-adhering it with contact cement is a five-minute fix; left alone, a lifted edge curls further and turns into a tripping hazard. The Resilient Floor Covering Institute, an industry group covering resilient flooring standards including rubber, publishes general maintenance guidance that lines up with what we tell every customer at handoff, available at rfci.com.
Frequently Asked Questions
Is Rubber Flooring Good for a Garage?
Yes. Rubber flooring hides slab cracks and oil stains, resists dropped tools, holds up under vehicle weight at 3/8 inch thickness or more, and is slip resistant when wet. It is one of the few flooring materials made to go over an imperfect garage slab without repairing it first.
Does Rubber Flooring Hide Cracks in a Garage Floor?
Yes, for hairline cracks under about 1/16 inch, which generally do not telegraph through 3/8 inch rubber or thicker. Wider cracks, or cracks with one side higher than the other, still need to be filled with epoxy crack filler and ground flush before the rubber goes down.
Can You Park a Car on Rubber Garage Flooring?
Yes, garage-rated rubber tile or rolled rubber at 3/8 inch or thicker handles daily parking and jack stand use without denting or compressing permanently. Hot tire pickup, where a hot tire leaves a sticky mark, is mostly a vinyl and PVC tile issue rather than a pure rubber one.
How Much Does Rubber Flooring Cost for a Garage?
A typical 400 square foot two-car garage runs $1,400 to $2,200 fully installed with interlocking tile, or $1,800 to $3,000 with rolled rubber, depending on thickness. Heavy-duty 3/4 inch rolled rubber for a workshop with heavy equipment runs higher, closer to $2,600 to $3,800.
Is Rubber Flooring or Epoxy Better for a Garage?
Rubber flooring hides existing cracks and stains without patching the slab first and installs in 1 to 2 days with no recoat needed. Epoxy bonds to the concrete, so cracks and control joints usually still show through it, and most coatings need a recoat every 5 to 10 years. Rubber costs more upfront per square foot; epoxy needs more slab prep and cure time.
Will Oil Stains Ruin Rubber Garage Flooring?
No, fresh oil and fluid drips wipe up easily with a rag and a pH-neutral or rubber-safe degreaser. Existing oil stains already in the concrete get degreased and cleaned before the rubber goes down so they do not bleed through, and once the rubber is installed it is not porous the way concrete is, so new drips do not soak in the same way.
Rolled Rubber or Interlocking Tile, Which Is Better for a Garage?
Interlocking tile is the better DIY option and makes sense if you want to pull up a section later for car repairs or a workbench move. Rolled rubber gives a cleaner, seamless finish and handles rolling tool chests and floor jacks more smoothly across the whole garage, but a professional install is recommended given its weight.
How Long Does It Take to Install Rubber Flooring in a Garage?
A typical two-car garage, including slab degreasing and crack repair, installs in 1 to 2 days for either interlocking tile or rolled rubber. Heavier 3/4 inch workshop-grade rubber or a garage that needs significant crack and patch work can take closer to 2 to 3 days.